
A Practical Beginner’s Guide to Gemmological Magnification
A gemstone can look perfectly clean to the naked eye and become an entirely different world under magnification.
A tiny crystal appears beneath the table.
A fracture reaches the surface.
Fine needles cross the stone.
Facet edges reveal abrasion.
Colour zoning becomes visible.
A polished surface suddenly shows scratches that were invisible seconds earlier.
The instrument capable of revealing all of this can fit in your pocket.
It is the 10× loupe.
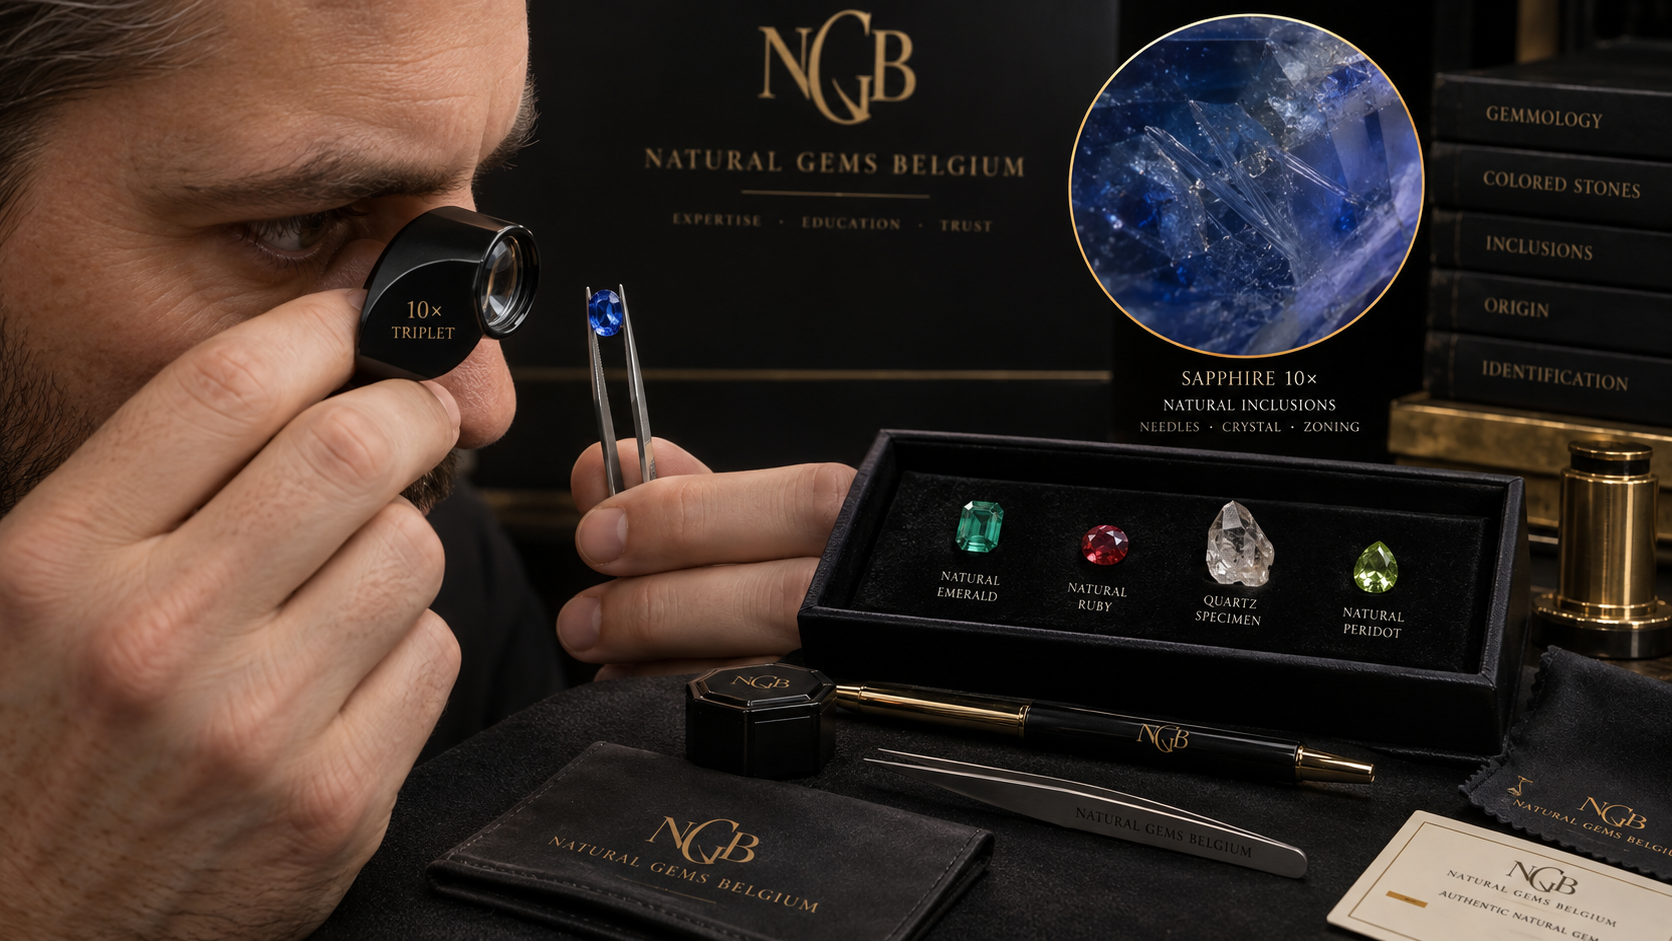
For gemmologists, jewellers, gemstone collectors and faceters, the loupe is one of the most fundamental observational tools.
But simply owning one does not mean you are using it correctly.
Poor focusing technique, incorrect lighting and uncontrolled movement can make a good loupe surprisingly ineffective. More importantly, magnification can reveal features without necessarily telling you what those features mean.
This distinction is fundamental.
A loupe helps you observe evidence.
It does not automatically identify a gemstone, prove geographic origin or determine treatment.
In this practical guide, we will learn how to use a 10x loupe systematically—and how to distinguish what you can reasonably conclude from what still requires professional gemmological testing.
Table of Contents
1. What Is a Gemmological Loupe?
A loupe is a small handheld magnifying instrument.
In jewellery and gemmology, the standard magnification is commonly:
10×
This means the apparent image is magnified approximately ten times compared with normal unaided viewing under the specified optical conditions.
Although stronger loupes exist, 10× provides a useful balance between:
- magnification;
- field of view;
- depth of focus;
- portability;
- ease of use.
It has therefore become an important standard magnification throughout the gem and jewellery industry.
2. Why 10×?
The importance of 10× is not arbitrary.
It is sufficiently powerful to reveal many important gemstone characteristics while remaining practical for handheld examination.
Under 10× magnification you may be able to see:
- mineral inclusions;
- fractures;
- needles;
- cavities;
- colour zoning;
- polish marks;
- facet-edge wear;
- chips;
- scratches;
- surface-reaching fissures;
- some treatment-related features;
- manufacturing features in jewellery.
Ten-times magnification is also central to professional diamond clarity grading.
The GIA clarity system evaluates clarity characteristics at 10× magnification, considering their size, nature, position, colour or relief and quantity.
This does not mean coloured gemstones should be graded using diamond clarity rules.
It demonstrates how important 10× observation has become as an industry reference point.
3. Why a Triplet Loupe Is Preferred
Not all magnifiers produce the same optical quality.
For serious gemstone examination, a 10× triplet loupe is generally preferable.
The word triplet refers to an optical system composed of three lens elements.
A well-designed gemmological triplet is corrected for two major optical problems:
chromatic aberration
and
spherical aberration.
4. Chromatic Aberration
A simple lens can bend different wavelengths of visible light by slightly different amounts.
This can create coloured fringes around objects.
That distortion is called:
chromatic aberration.
When examining very small gemstone features, false colour fringes are undesirable.
An achromatically corrected loupe reduces this effect.
5. Spherical Aberration
A simple curved lens may not bring light travelling through its centre and edges to exactly the same focus.
The result can be an image that is sharp in one region but distorted elsewhere.
This is:
spherical aberration.
An aplanatic loupe is corrected to minimise this distortion.
Professional triplet loupes are therefore often described as:
achromatic and aplanatic.
Gem-A, for example, specifies both corrections for its professional 10× triplet loupes, while GIA supplies a fully corrected 10× triplet loupe for gemmological examination.
6. Why Cheap Magnifiers Can Be Frustrating
An inexpensive uncorrected magnifier may still enlarge a gemstone.
But you may notice:
- blurred edges;
- distorted peripheral areas;
- coloured fringes;
- small usable viewing area;
- poor focus.
A beginner may incorrectly assume that the difficulty comes from lack of skill.
Sometimes the optical instrument itself is the problem.
For repeated gemstone work, optical quality matters.
7. Before You Begin: Clean the Gemstone
This step is routinely underestimated.
Before examining a gemstone, clean it appropriately.
Dust, fingerprints, fibres and grease can resemble or obscure internal features.
A fingerprint on a table facet can become remarkably dramatic under 10×.
Use an appropriate clean gem cloth where safe for the material.
Remember that not every gemstone tolerates identical cleaning methods.
For loupe examination, the objective is simply to remove loose surface contamination without risking the stone.
8. Clean the Loupe Too
A dusty loupe creates another layer of confusion.
Inspect and clean the lens surfaces carefully.
Dust on the lens can appear to move with your field of view and make examination unnecessarily difficult.
Store the loupe in its protective case when it is not being used.
Good observational work begins with clean optics.
9. Choose a Safe Workspace
Gemstones are small.
Dropping one onto a hard floor is an avoidable risk.
Work over:
- a gem tray;
- soft pad;
- clean table mat;
- controlled work surface.
Avoid examining loose stones directly over:
- tiled floors;
- sinks;
- open drains;
- cluttered workbenches.
A loupe may be inexpensive.
The gemstone in your tweezers may not be.
10. Use Suitable Lighting
Magnification without good lighting is surprisingly ineffective.
For general examination, use a strong, neutral light source.
A daylight-equivalent source can be useful for many observations.
Avoid assuming that one illumination method reveals everything.
Professional gemmological microscopy uses several lighting techniques precisely because different features respond differently.
These include:
- darkfield;
- diffused light;
- reflected light;
- fibre-optic illumination;
- polarised light.
A handheld loupe cannot reproduce the full flexibility of a professional microscope, but changing the direction of your light can still reveal dramatically different information.
11. The Most Important Technique: Loupe to the Eye
Beginners frequently hold the loupe somewhere between the eye and gemstone and then move everything around trying to find focus.
That is inefficient.
Instead:
bring the loupe close to your eye.
Very close.
Keep it there.
Then bring the gemstone toward the loupe until the image comes into focus.
This creates a much more stable optical system.
12. Which Eye Should You Use?
Use whichever eye feels most natural.
Most people instinctively choose their dominant eye.
You do not necessarily need to close the other eye.
With practice, keeping both eyes open can reduce facial tension and eye fatigue.
Initially, however, closing the unused eye may make concentration easier.
Comfort matters because careful examination requires stability.
13. Stabilise Your Hands
Hand movement becomes much more obvious under magnification.
One of the easiest ways to improve stability is to connect your hands physically.
For example:
- loupe hand close to the face;
- gemstone or tweezer hand brought toward it;
- fingers or knuckles lightly touching where comfortable.
The exact grip varies between users.
The principle is:
create one stable system rather than two independently moving hands.
14. Hold the Gemstone Securely
Loose faceted gemstones are commonly held with gem tweezers.
Grip the stone gently but securely.
Avoid excessive pressure.
Where practical, hold the stone around the girdle rather than pressing directly against vulnerable points or sharp corners.
Be particularly cautious with:
- brittle materials;
- stones with open fractures;
- thin girdles;
- sharp marquise or pear points;
- delicate carvings.
The purpose is examination—not a grip-strength test.
15. Find Focus Before Searching for Inclusions
Do not immediately begin hunting inside the gemstone.
First establish focus on something obvious.
For a faceted stone, start with:
- table facet;
- facet junction;
- girdle;
- surface scratch.
Once the surface is sharply focused, you know where your focal plane is.
Then slowly move the gemstone toward or away from the loupe to examine deeper planes.
16. Think in Layers
A transparent gemstone is three-dimensional.
You cannot normally inspect its entire depth sharply at one instant with a handheld loupe.
Think of the stone as a series of optical layers:
surface → shallow interior → middle → deeper interior → opposite facets
Move gradually through these layers.
This is far more effective than randomly rotating the gemstone while searching for “something interesting.”
17. Start with the Outside
A systematic examination begins externally.
Inspect:
- table;
- crown facets;
- girdle;
- pavilion;
- culet or keel where applicable.
Look for:
- scratches;
- chips;
- abrasions;
- pits;
- polish lines;
- damaged facet junctions;
- cavities;
- surface-reaching fractures.
External condition can tell you a great deal before you even examine the interior.
18. Inspect the Facet Junctions
Facet edges can reveal wear particularly clearly.
A well-polished recently cut gemstone should generally have relatively crisp facet junctions appropriate to its material and cutting quality.
Rounded or abraded junctions may indicate:
- wear;
- contact with harder materials;
- older jewellery use;
- lower polishing quality.
Do not use facet wear alone to identify a gemstone.
Hardness, setting, age and wear history all influence surface condition.
19. Examine the Girdle Carefully
The girdle deserves special attention because it is vulnerable to damage.
Look for:
- chips;
- bruises;
- fractures;
- naturals;
- cavities;
- abrasions.
In mounted jewellery, portions of the girdle may be hidden beneath prongs or bezel metal.
Never force a mounted gemstone to expose areas that cannot safely be viewed.
20. Now Move Inside the Gemstone
Once the surface has been examined, shift focus into the stone.
Search systematically rather than randomly.
Rotate the gemstone slowly.
Look through:
- table;
- crown facets;
- pavilion facets.
A feature invisible through one direction may become obvious from another.
21. Why Rotation Matters
Gemstone inclusions interact with light.
A transparent crystal inclusion may disappear against one background and become highly reflective after only a small rotation.
A fracture may flash brightly at one angle.
Fine needles may become visible only when illuminated obliquely.
Colour zoning can strengthen or disappear depending on orientation.
Therefore:
Never make a loupe observation from one static viewing direction alone.
22. Use Reflected Light for the Surface
Reflected light is particularly useful when examining:
- polish;
- scratches;
- surface pits;
- coatings;
- facet edges;
- abrasions.
Position the stone so the light reflects from the surface toward you.
Surface features will often become much more obvious.
GIA uses reflected illumination in professional microscopy specifically to reveal surface characteristics.
The same principle can be adapted to loupe examination.
23. Use Transmitted Light for Internal Features
If light can pass through the gemstone, transmitted illumination can help reveal:
- inclusions;
- colour zoning;
- internal fractures;
- clouds;
- growth structures.
Move the gemstone between yourself and a suitable light source while maintaining loupe focus.
Do not stare directly into an excessively intense light.
Controlled illumination is more useful than maximum brightness.
24. Try Oblique Lighting
Move the light to the side.
A small directional light can make some inclusions suddenly stand out.
This is particularly useful for:
- reflective crystals;
- fractures;
- needles;
- cavities.
Professional microscopes use fibre-optic lighting because being able to change the illumination angle is extraordinarily powerful.
With a loupe and small lamp, you can apply a simplified version of the same principle.
25. What Is an Inclusion?
An inclusion is an internal feature contained within a gemstone or extending into it.
Possible inclusions include:
- mineral crystals;
- needles;
- fluids;
- gases;
- cavities;
- partially healed fractures;
- particle clouds;
- growth features.
They are not simply “defects.”
They can contain information about:
- natural crystal growth;
- geological environment;
- treatment;
- synthetic growth.
Interpretation, however, requires caution.
26. Solid Crystal Inclusions
You may see a small crystal enclosed within the gemstone.
It can appear:
- transparent;
- dark;
- coloured;
- reflective;
- rounded;
- angular.
Do not immediately name it.
A tiny crystal that “looks like zircon” is not automatically zircon.
Professional laboratories may use analytical techniques such as Raman spectroscopy to establish mineral identity.
Under a loupe, a safer observation is:
“A transparent angular crystal inclusion is visible.”
Observation comes before interpretation.
27. Needles
Fine needle-like inclusions occur in many gemstones.
In sapphire and ruby, oriented rutile can form famous patterns commonly called:
silk.
But not every needle in every gemstone is rutile.
Needle-like inclusions can consist of different minerals or structures.
Record what you actually see:
- isolated or grouped;
- parallel or intersecting;
- straight or curved;
- reflective or dark.
Avoid jumping from shape directly to mineral identity.
28. Fractures and Fissures
Internal fractures can appear as:
- flat planes;
- reflective flashes;
- feather-like structures;
- networks;
- irregular fissures.
Their importance depends strongly on position.
A small internal fracture may have limited durability impact.
A large fracture reaching the surface may be much more important.
When examining a fracture, ask:
Does it reach the surface?
That is often more useful than simply asking how large it looks.
29. How to Check Whether a Fracture Reaches the Surface
Rotate the gemstone and trace the feature toward its apparent endpoint.
Then examine the corresponding surface.
Look for:
- a fine line;
- change in polish;
- tiny opening;
- interruption of reflected light.
This can be difficult at 10×.
If the answer matters commercially or structurally, microscopic examination may be required.
Do not force certainty where the loupe cannot provide it.
30. Fingerprint-Like Inclusions
Partially healed fractures can create intricate patterns resembling:
- fingerprints;
- feathers;
- nets;
- brush strokes.
These can be extremely beautiful.
They formed when a fracture partially healed during geological processes, leaving small cavities or fluid-related structures behind.
Fingerprint-like features occur in several gemstones.
Their presence alone does not identify one gemstone species or one geographic origin.
31. Gas and Fluid Inclusions
Some gemstones contain microscopic fluid or gas phases.
Under sufficient magnification you may occasionally see:
- a cavity;
- a bubble;
- more than one phase.
Certain inclusion combinations can contribute strongly to identification.
GIA, for example, notes that liquid or two-phase inclusions visible with a 10× loupe can help distinguish some emeralds from visually similar garnets.
But this is evidence in context—not a universal shortcut.
32. Peridot and “Lily Pad” Inclusions
One well-known loupe observation is the so-called:
lily pad inclusion
associated with peridot.
These disc-like features can surround small inclusions and are often cited as useful identification evidence.
GIA notes that seeing characteristic lily-pad features at 10× can help separate peridot from visually similar demantoid garnet.
This is a good example of the loupe’s value.
It provides a clue that can guide identification.
It should still be considered alongside other gemmological properties.
33. Colour Zoning
Not everything visible inside a gemstone is a foreign inclusion.
Many natural crystals show:
colour zoning.
Look for:
- straight bands;
- angular zones;
- curved zones;
- patches;
- colourless and coloured regions.
Diffused illumination can be particularly useful for revealing zoning.
GIA uses this technique in professional coloured-stone microscopy.
With a loupe, experimenting with a diffuse white background can sometimes make zoning much easier to see.
34. Growth Structures
Crystals grow according to their internal crystallography.
That growth can leave visible structures.
Some are straight or angular.
Others may be curved in certain synthetic materials.
Growth structures can be important in distinguishing:
- natural;
- laboratory-grown;
- differently manufactured materials.
But interpreting them correctly requires experience.
Do not assume every curved line proves synthetic origin or every straight line proves natural origin.
35. Bubbles
Round inclusions often attract immediate attention.
Beginners frequently learn:
“bubbles mean glass.”
That rule is too simplistic.
Gas bubbles are common in many glasses and can be useful evidence.
But bubble-like structures or rounded cavities can occur in other materials and circumstances.
The correct observation is:
“A rounded bubble-like inclusion is present.”
Then combine that with:
- lustre;
- optical properties;
- other inclusions;
- refractive index where appropriate.
Identification should emerge from converging evidence.
36. Doubling
Some doubly refractive gemstones can produce visible doubling of back facet edges when viewed in certain directions.
With the loupe, you may see two images of a facet junction.
This can be useful supporting evidence in some gemstones.
However:
- not all birefringent gemstones show obvious doubling;
- orientation matters;
- magnification and facet geometry affect visibility.
Do not identify a stone from doubling alone.
37. Examine Transparency
While rotating the gemstone, note whether internal features affect:
- transparency;
- brilliance;
- light return.
A dense cloud may reduce transparency.
A small isolated crystal may have almost no visible effect.
This distinction matters when evaluating beauty and quality.
Counting inclusions is rarely as useful as understanding their optical impact.
38. Inclusion and Quality Are Not the Same Question
An inclusion can have several different meanings.
Identification significance
Can it help identify the material?
Treatment significance
Does it show evidence of heating or another treatment?
Durability significance
Could it create structural weakness?
Appearance significance
Does it visibly reduce beauty?
Scientific significance
Does it reveal something about crystal growth?
These questions should be kept separate.
A scientifically fascinating inclusion may have almost no negative visual impact.
39. Search for Treatment Clues—but Be Careful
Magnification can reveal features associated with gemstone treatments.
Depending on the material and treatment, these might include:
- altered inclusions;
- residue in fractures;
- flash effects;
- filled cavities;
- dye concentrations;
- coating damage;
- heat-altered minerals.
But treatment identification can be extremely complex.
A loupe may raise suspicion.
It does not necessarily establish the treatment.
40. Heat Treatment Is a Good Example of the Limit
Consider sapphire.
High-temperature heating can alter:
- rutile silk;
- zircon inclusions;
- fractures.
Some of these changes can be visible under magnification.
But lower-temperature heating may leave inclusions looking surprisingly natural.
Therefore:
intact-looking inclusions do not prove that a sapphire is unheated.
Spectroscopic or laboratory testing may be required.
This is exactly why observation and conclusion must remain separate.
41. Fracture Filling
Certain gemstones can have fractures filled with foreign substances to improve apparent clarity.
Under magnification, possible evidence may include:
- flash effects;
- flow structures;
- bubbles;
- differences in lustre;
- filled surface-reaching fissures.
However, appearances vary substantially with:
- material;
- filler;
- lighting;
- treatment technique.
If treatment status affects value, obtain appropriate laboratory testing rather than relying on a quick loupe inspection.
42. Dye
Dye may concentrate in:
- fractures;
- pores;
- cavities;
- drill holes;
- grain boundaries.
Magnification can sometimes reveal unnatural colour concentrations.
This can be particularly useful with porous or fractured gem materials.
But absence of visible dye concentrations does not prove absence of treatment.
Again, the loupe is a screening tool.
43. Coatings
Surface coatings can sometimes be detected by examining:
- facet junctions;
- scratches;
- worn areas;
- chipped edges;
- colour concentrations.
A coating may become damaged at exposed edges and reveal a different underlying colour.
Reflected light is especially useful.
Some sophisticated coatings, however, are difficult to recognise without further testing.
44. Natural Versus Laboratory-Grown
Magnification is one of the most powerful tools in natural-versus-synthetic investigation.
Natural gemstones may contain inclusions related to geological formation.
Laboratory-grown materials can contain features related to their growth process.
Examples may include:
- growth structures;
- flux residues;
- metallic inclusions;
- gas bubbles;
- characteristic zoning.
But synthetic gemstone technology is sophisticated.
Some laboratory-grown stones can contain inclusions that look surprisingly natural.
GIA has documented synthetic diamonds whose inclusions could appear natural during a quick 10× examination.
Therefore:
A convincing-looking inclusion is not absolute proof of natural origin.
45. A Loupe Cannot Replace a Gemmological Laboratory
This is perhaps the most important lesson in the entire guide.
A 10× loupe is extremely useful.
But it cannot directly measure:
- refractive index;
- birefringence;
- absorption spectrum;
- trace-element chemistry;
- Raman spectrum;
- infrared absorption;
- fluorescence imaging patterns.
Professional gemstone identification may require several independent tests.
GIA’s gem identification training includes instruments such as:
- microscope;
- refractometer;
- polariscope;
- dichroscope;
- spectroscope;
- specialised lighting.
Advanced laboratories add sophisticated analytical instrumentation.
The loupe begins an investigation.
It does not necessarily finish it.
46. Loupe Versus Microscope
A loupe is ideal for:
- rapid examination;
- portability;
- surface condition;
- obvious inclusions;
- preliminary screening.
A gemmological microscope offers:
- higher magnification;
- greater stability;
- controlled focusing;
- specialised illumination;
- improved inclusion interpretation.
GIA coloured-stone gemmologists may examine stones microscopically at magnifications up to approximately 50×.
The microscope does not make the loupe obsolete.
The two instruments serve different stages of examination.
47. Lighting Is Where the Microscope Gains Enormous Power
Professional gemmological microscopes can use:
Darkfield
Makes many inclusions stand out brightly against a dark background.
Diffused illumination
Can reveal colour zoning.
Reflected light
Highlights surfaces.
Fibre-optic illumination
Allows precise directional lighting.
Polarised light
Can reveal strain and optically oriented features.
A handheld loupe offers only a simplified version of these possibilities.
Understanding this limitation prevents overconfidence.
48. Mounted Gemstones
Examining a gemstone in jewellery introduces additional challenges.
The setting may hide:
- girdle areas;
- pavilion;
- inclusions;
- chips;
- treatment evidence.
Metal can also reflect light into the stone and change its apparent appearance.
Inspect mounted gemstones from as many safe directions as possible.
Never bend prongs or manipulate a setting simply to improve your view.
If removal is necessary, it should be performed by an appropriate jewellery professional.
49. Look at the Jewellery Too
A loupe is not only useful for the gemstone.
Inspect:
- prongs;
- bezels;
- solder joins;
- hallmarks;
- surface wear;
- cracks;
- loose settings.
A worn prong can be more immediately important than a tiny gemstone inclusion.
For jewellery owners, magnification can therefore contribute to preventative maintenance.
50. A Repeatable 10× Examination Routine
Consistency improves observation.
Use the same sequence every time.
Step 1 — Clean
Clean the gemstone and loupe appropriately.
Step 2 — Naked-Eye Observation
Before magnification, observe:
- colour;
- transparency;
- overall cut;
- obvious damage.
Step 3 — Surface at 10×
Focus on the table and inspect all exterior surfaces.
Step 4 — Girdle
Check for chips, fractures and cavities.
Step 5 — Interior
Focus progressively through the stone.
Step 6 — Rotate
Examine through several facets and orientations.
Step 7 — Change Lighting
Try reflected, transmitted and oblique illumination.
Step 8 — Record
Describe what you actually see.
Step 9 — Interpret
Consider possible significance.
Step 10 — Escalate When Necessary
If identification, treatment or origin matters and the evidence is insufficient, use additional gemmological testing or a professional laboratory.
51. Observation Language Matters
Compare these two notes:
Poor observation:
“Natural untreated Sri Lankan sapphire with zircon.”
Better observation:
“Blue transparent faceted stone. Fine intersecting needle-like inclusions visible under 10×. One small colourless angular crystal with surrounding reflective fracture.”
Why is the second better?
Because it separates:
what was observed
from
what might later be concluded.
This discipline is fundamental to scientific gemmology.
52. Keep an Examination Notebook
If you are learning gemmology, record your observations.
For each stone note:
- date;
- stone number;
- apparent colour;
- transparency;
- cut;
- visible inclusions;
- surface condition;
- lighting used;
- questions requiring further testing.
Sketch inclusion positions if useful.
Over time, this becomes your own observational reference library.
Learning gemmology is partly the process of training your eyes to recognise patterns.
53. Photograph What You Can
A smartphone placed behind a loupe can sometimes capture useful images, although alignment can be difficult.
These photographs should not be confused with professional photomicrography.
But they can help you:
- record inclusions;
- compare stones;
- monitor damage;
- document interesting features.
For serious inclusion photography, a microscope-camera system is far more capable.
54. Train with Known Stones
One of the best ways to improve loupe skills is to practise on gemstones whose identity is already known.
Create a small study set containing examples such as:
- quartz;
- peridot;
- garnet;
- sapphire;
- emerald;
- glass.
Do not begin by trying to identify unknown stones from appearance alone.
First learn what known materials look like.
Observation precedes identification skill.
55. Examine the Same Stone Repeatedly
A useful exercise is to examine one gemstone for five minutes today.
Then examine it again tomorrow.
You will often find features you missed completely during the first session.
This demonstrates an important reality:
seeing is a learned skill.
Magnification does not automatically produce observation.
Experience teaches you where and how to look.
56. Do Not Hunt Only for “Perfect” Stones
Highly included gemstones are excellent training material.
They teach you to recognise:
- crystals;
- fractures;
- needles;
- clouds;
- zoning.
Commercially inexpensive stones can therefore be exceptionally valuable educational specimens.
A gemstone does not need to be valuable to be scientifically interesting.
57. Common Beginner Mistakes
Holding the loupe too far from the eye
This reduces stability and field of view.
Moving the loupe instead of the stone
Keep the loupe relatively stable and bring the gemstone into focus.
Using insufficient light
Magnification needs illumination.
Looking through only the table
Other viewing directions may reveal much more.
Rotating too quickly
Subtle features can flash into view for only a moment.
Naming inclusions immediately
Describe first. Identify later.
Assuming one inclusion proves identity
Gem identification requires converging evidence.
Assuming “clean under loupe” means natural or untreated
It does not.
58. Evidence Classification
| Statement | Classification |
|---|---|
| 10× magnification is a standard reference in professional diamond clarity grading | Established gemmological practice |
| A triplet loupe can reduce chromatic and spherical aberration | Established optical principle |
| 10× can reveal many gemstone inclusions and surface features | Established gemmological practice |
| Inclusion observations can contribute to gemstone identification | Established gemmological practice |
| Some characteristic inclusions can provide strong identification clues | Established gemmological fact |
| Magnification can reveal evidence associated with treatments | Established gemmological practice |
| A loupe alone can identify every gemstone reliably | Incorrect |
| One apparently natural inclusion always proves natural origin | Incorrect |
| Intact sapphire inclusions always prove absence of heating | Incorrect |
| Every gas bubble proves glass | Incorrect oversimplification |
| Every needle in sapphire is rutile | Incorrect |
| Geographic origin can normally be established with a loupe alone | Incorrect |
59. The Most Important Habit: Separate Seeing from Knowing
A good gemmologist constantly asks two different questions.
What do I see?
Example:
“A transparent crystal with a reflective halo.”
What might it mean?
Possibilities:
- mineral inclusion;
- identification clue;
- treatment evidence;
- geological information.
The first statement is observational.
The second is interpretative.
Confusing them creates errors.
Keeping them separate creates good gemmology.
60. When Should You Stop Using the Loupe?
Stop and move to additional testing when the question exceeds what magnification can reliably answer.
Examples include:
Is this stone definitely natural?
Has this sapphire been heated?
Is this emerald fracture-filled?
Is this ruby from Myanmar?
Is this blue stone sapphire, spinel or synthetic material?
The loupe may provide clues.
But commercially significant conclusions often require additional testing.
Recognising the limit of your instrument is part of using it professionally.
Conclusion
A 10× loupe is one of the smallest instruments in gemmology.
It is also one of the most useful.
Used correctly, it can reveal an extraordinary amount of information.
Surface scratches become visible.
Facet wear emerges.
Fractures can be traced.
Mineral inclusions appear.
Needles, clouds and colour zoning reveal aspects of crystal growth.
Treatment clues may become apparent.
Characteristic inclusions can help guide gemstone identification.
But the greatest lesson a loupe teaches is not magnification.
It is observation discipline.
Bring the loupe close to the eye.
Bring the gemstone into focus.
Examine the surface first.
Move progressively through the interior.
Rotate slowly.
Change the lighting.
Describe what you actually see.
Only then begin interpreting it.
And when the evidence exceeds what 10× magnification can establish, move to the next instrument rather than forcing a conclusion.
That progression—
observe → describe → compare → test → conclude
—is one of the foundations of professional gemmology.
The loupe does not give you the answer.
It teaches you how to start asking the right questions.
References & Further Reading
Gemological Institute of America — “GIA 4Cs: Clarity.”
Authoritative explanation of the role of 10× magnification in professional diamond clarity grading and the factors considered when evaluating clarity characteristics, including their size, nature, position, colour or relief and quantity.
https://www.gia.edu/4cs-clarity
Gemological Institute of America — “Hand Loupe 10× – 18 mm.” GIA Instruments.
Technical reference for GIA’s fully corrected 10× triplet loupe. Particularly relevant to the discussion of professional loupe construction and corrected optics.
https://store.gia.edu/products/hand-loupe-10x-18-mm-and-gia-lanyard
The Gemmological Association of Great Britain (Gem-A) — “10× Triplet Loupe.”
Gem-A specifies an achromatic and aplanatic optical system for its professional 10× triplet loupe, providing a useful contemporary reference for the optical characteristics expected of a gemmological loupe.
https://shop.gem-a.com/product/gem-a-10x-triplet-loupe-with-chrome-finish/
Gemological Institute of America — “A Case of Mistaken Identity?”
Practical examples demonstrating how observations under a 10× loupe can contribute to gemstone identification, including liquid or two-phase inclusions in emerald and characteristic lily-pad features in peridot.
https://www.gia.edu/gia-news-research/case-mistaken-identity
Gemological Institute of America — “How GIA Analyzes Colored Stones from Start to Finish.”
An important reference for understanding both the power and limits of magnification. GIA describes microscopic examination up to 50× and explains how darkfield, diffused, reflected, fibre-optic and polarised illumination reveal different gemstone features.
https://www.gia.edu/gia-news-research/guide-how-gia-analyzes-colored-stones
Gemological Institute of America — “Gem Identification.”
Overview of professional gem-identification training and the combination of microscope, refractometer, polariscope, dichroscope, spectroscope and specialised lighting used in systematic gemstone testing. It demonstrates why magnification is one component of identification rather than a complete identification method.
https://www.gia.edu/gem-education/course-gem-ident
Gemological Institute of America — “GIA Gemolite NXT Microscope.”
Technical reference documenting professional gemmological illumination methods including darkfield, brightfield, diffused, reflected, polarised and fibre-optic lighting. Useful for understanding how observations begun with a loupe are extended under a microscope.
https://store.gia.edu/collections/instruments/products/gia-gemolite-nxt-microscope
Ardon, T. — “CVD Synthetic Diamond with Unusual Inclusions.” Gems & Gemology, Fall 2014, Gemological Institute of America.
A particularly valuable cautionary example showing that some synthetic diamond inclusions can appear convincingly natural during examination with a standard 10× loupe, reinforcing the need for additional testing before determining natural or laboratory-grown origin.
https://my.gia.edu/gems-gemology/fall-2014-labnotes-cvd-synthetic-diamond-with-unusual-inclusions
CIBJO — The World Jewellery Confederation, Diamond Blue Book.
International industry reference demonstrating the established role of examination at 10× magnification in clarity terminology and grading practice.
https://cibjo.org/wp-content/uploads/2022/10/CIBJO-Diamond-Blue-Book-2022-1.pdf