
Table of Contents
Before Measuring a Gemstone, Look at It
A gemstone arrives on the examination desk.
You could immediately reach for the refractometer.
Or the polariscope.
Or the spectroscope.
But first:
look at the stone.
Then:
look closer.
A simple 10× loupe can reveal:
- facet wear;
- scratches;
- chips;
- cavities;
- fractures;
- crystals;
- needles;
- fingerprints;
- growth structures;
- colour zoning;
- polishing marks;
- possible treatment features.
Move to a gemmological microscope and an apparently clean gemstone can become an entire three-dimensional landscape.
But magnification is only useful when observation is systematic.
Seeing an inclusion is not enough.
The gemologist must ask:
Where is it?
Is it on the surface or inside the gemstone?
What is its shape?
How does it react when the stone rotates?
How does it look under another illumination method?
Is it actually one inclusion—or several reflections of one inclusion?
Does it support an identification?
Could it indicate treatment?
Could it indicate natural or synthetic growth?
And perhaps most importantly:
What can I legitimately conclude from it?
This guide develops a practical workflow from naked-eye observation through 10× loupe examination and into gemmological microscopy.
The goal is not simply to magnify a gemstone.
The goal is to:
OBSERVE IT CORRECTLY.
PART I — WHY MAGNIFICATION MATTERS
Gemstones are geological materials.
Even exceptionally transparent gems can preserve microscopic evidence of:
- crystal growth;
- geological environment;
- deformation;
- healing;
- interaction with fluids;
- later treatment.
A natural gemstone may contain another mineral crystal that became trapped while the host crystal was growing.
It may contain a cavity partially filled with fluid.
A fracture may have healed during geological growth.
A later fracture may have been filled artificially.
A synthetic gemstone may preserve structures created by laboratory growth.
Heat treatment may alter pre-existing inclusions.
Surface polishing may reveal wear or damage.
Magnification gives us access to this evidence.
But the evidence must be interpreted rather than merely admired.
PART II — THE FIRST RULE: CLEAN THE GEMSTONE
Before magnification:
CLEAN THE STONE.
Dust can look surprisingly convincing under magnification.
So can:
- lint;
- fingerprints;
- grease;
- polishing residue;
- dried cleaning solution.
A tiny particle sitting on a facet can easily be mistaken for an internal inclusion.
A fingerprint on the table facet can obscure an entire microscopic scene.
Use an appropriate clean gemstone cloth and, where safe for the material, a suitable cleaning method.
Then inspect again.
If a suspicious feature disappears after cleaning, you have already learned something important:
it was not an inclusion.
PART III — KNOW THE MATERIAL BEFORE CLEANING AGGRESSIVELY
Not every gemstone tolerates the same cleaning method.
Some gems may be:
- porous;
- fracture-filled;
- oil-treated;
- resin-impregnated;
- sensitive to heat;
- sensitive to chemicals.
Therefore:
inspection precedes aggressive cleaning.
When the identity or treatment status is unknown, begin conservatively.
A clean soft cloth is often a safer starting point than assuming the stone can tolerate ultrasonic cleaning, steam or solvents.
Gem examination should never damage the specimen being examined.
PART IV — START WITH THE UNAIDED EYE
Before reaching for magnification, record what can already be seen.
Observe:
BODY COLOUR
TRANSPARENCY
CUT STYLE
APPARENT LUSTRE
COLOUR DISTRIBUTION
VISIBLE FRACTURES
OBVIOUS INCLUSIONS
SURFACE DAMAGE
OPTICAL PHENOMENA
This establishes the macroscopic context.
Magnification should refine the observation—not replace it.
PART V — WHY 10×?
The 10× loupe is one of the fundamental tools of gemmology.
GIA includes a fully corrected 10× loupe among the basic equipment required for practical gem identification.
Ten-power magnification offers an excellent compromise.
It is strong enough to reveal many diagnostically useful features while still providing:
- useful depth of field;
- a manageable field of view;
- portability;
- rapid examination.
For many stones, 10× tells us whether further microscopic investigation is necessary.
PART VI — WHAT IS A TRIPLET LOUPE?
A high-quality gemmological loupe is commonly a:
TRIPLET.
Rather than using one simple lens, it uses a corrected multi-element optical system.
A good gemmological triplet is designed to reduce:
chromatic aberration
and:
spherical / field distortion.
Gem-A describes its 10× triplet loupe as both:
achromatic
and:
aplanatic.
The objective is simple:
the feature you see should be produced by the gemstone—not by poor optics.
PART VII — WHY CHEAP MAGNIFIERS CAN MISLEAD
A poorly corrected magnifier can introduce:
- coloured fringes;
- edge distortion;
- blurred peripheral areas;
- poor focus.
For casual inspection this may be tolerable.
For gemmology it can be problematic.
When assessing subtle features such as:
- fine needles;
- curved growth structures;
- fracture textures;
- tiny crystals,
optical quality matters.
Magnification without optical correction can increase apparent detail while decreasing reliability.
PART VIII — HOW TO HOLD A LOUPE
A common beginner mistake is to hold the loupe far away and move it around while trying to find focus.
Instead:
1. BRING THE LOUPE CLOSE TO YOUR EYE.
2. KEEP THE LOUPE RELATIVELY STABLE.
3. BRING THE GEMSTONE TOWARD THE LOUPE UNTIL IT ENTERS FOCUS.
4. MOVE THE GEMSTONE SLIGHTLY TO EXPLORE DIFFERENT DEPTHS.
This creates a much more stable optical system.
With practice, the loupe almost becomes an extension of the eye.
PART IX — CONTROL STRAY LIGHT
Place the loupe close enough to the eye that excessive ambient light does not enter from the side.
The other hand can sometimes help shield unwanted illumination.
Why?
Because reflections from:
- room lights;
- windows;
- bright walls
can overwhelm subtle internal features.
Good gemmology is often less about having:
more light
and more about having:
the correct light.
PART X — HOLD THE GEMSTONE SECURELY
Loose faceted gemstones are normally handled with:
gemstone tweezers.
Grip the stone securely but gently.
Avoid excessive pressure.
The objective is to:
- protect the gemstone;
- prevent dropping;
- permit rotation;
- minimise obstruction.
The ability to rotate the gemstone smoothly is essential.
A static view gives only:
one projection of a three-dimensional object.
PART XI — BEGIN WITH THE SURFACE
Before looking deep inside the stone, inspect:
THE SURFACE.
Look for:
- scratches;
- abrasions;
- chips;
- pits;
- cavities;
- polishing lines;
- worn facet junctions;
- extra facets;
- naturals;
- surface-reaching fractures.
This is important because surface features are frequently mistaken for internal ones.
PART XII — SURFACE OR INTERNAL?
This is one of the first skills a gemologist must develop.
Suppose you see a thin line.
Is it:
a scratch on the table
or:
a fracture below the table?
Change the focus.
If the line comes into focus simultaneously with the facet surface, it is probably on that surface.
If the surface goes out of focus while the feature becomes sharp deeper inside, the feature is internal.
This technique is called:
FOCUSING THROUGH THE STONE.
PART XIII — FOCUSING THROUGH DEPTH
A gemstone is three-dimensional.
Microscopic features exist at different depths.
Move the focus progressively:
surface
↓
just below the surface
↓
middle of the stone
↓
deeper interior
↓
pavilion region.
This helps determine the spatial relationship among features.
A group of apparent inclusions may actually be:
- one inclusion;
- reflected several times;
- distributed at different depths.
Depth perception is essential.
PART XIV — FACETS CREATE MIRRORS
Faceted gemstones contain multiple reflecting surfaces.
An inclusion can therefore appear:
several times.
GIA demonstrates this beautifully in spinel: one internal inclusion can produce several visible reflections because of its position relative to the stone’s facets.
Therefore:
FIVE APPARENT INCLUSIONS MAY ACTUALLY BE ONE.
Rotate the stone.
If several apparent features move in a coordinated optical pattern, reflections may be involved.
Never count inclusions from a single static view.
PART XV — LOOK THROUGH THE TABLE FIRST
For many transparent faceted gemstones, begin through the:
table facet.
It usually provides the largest optical window into the interior.
Scan systematically:
UPPER LEFT
↓
UPPER RIGHT
↓
CENTRE
↓
LOWER LEFT
↓
LOWER RIGHT
Then change depth and repeat.
A systematic scan is far more reliable than randomly searching for something interesting.
PART XVI — THEN USE THE CROWN FACETS
The table does not reveal everything.
A feature may be hidden by:
- extinction;
- reflections;
- facet geometry;
- colour concentration.
Tilt the stone and examine through:
crown facets.
Different viewing windows can reveal inclusions that were invisible through the table.
PART XVII — THEN EXAMINE FROM THE PAVILION
Where practical, inspect through:
pavilion facets.
A fracture that appears ambiguous from above may become obvious from below.
Growth structures may become more visible.
Colour zoning may change appearance.
Some treatment-related features are easier to understand when viewed from several directions.
Never assume that the face-up view tells the complete story.
PART XVIII — ROTATE THE STONE
One of the most powerful gemmological techniques costs nothing:
ROTATION.
Rotate the gemstone:
- left and right;
- forward and backward;
- around its vertical axis.
Observe how features change.
A surface reflection may disappear.
A fracture may flash.
A needle may become visible.
A growth band may suddenly become obvious.
An inclusion may reveal that it has three-dimensional form.
The gemstone is not a photograph.
Treat it as a:
three-dimensional optical object.
PART XIX — THE FIRST INCLUSION CATEGORIES
At first, do not try to name every microscopic feature precisely.
Begin by classifying broadly.
Is the feature:
SOLID?
LIQUID?
GAS?
A CAVITY?
A FRACTURE?
A GROWTH FEATURE?
A NEEDLE OR FIBRE?
A SURFACE FEATURE?
This prevents premature identification.
Observation should precede interpretation.
PART XX — SOLID INCLUSIONS
A gemstone can contain another mineral.
These are:
solid inclusions.
They may appear as:
- euhedral crystals;
- rounded crystals;
- plates;
- needles;
- grains;
- opaque particles.
A solid inclusion may provide valuable evidence about:
- natural origin;
- geological environment;
- host mineral;
- locality.
But appearance alone does not always establish the inclusion’s identity.
A red crystal is not automatically:
garnet.
A black crystal is not automatically:
spinel.
Description comes before naming.
PART XXI — NEGATIVE CRYSTALS
Some cavities inside gemstones have shapes controlled by the crystal structure of the host.
These are commonly called:
NEGATIVE CRYSTALS.
They may resemble small crystals, yet they are actually:
cavities.
GIA illustrates negative crystals in amethyst whose outlines reflect the crystal structure of the host quartz.
A negative crystal may contain:
- liquid;
- gas;
- solid phases;
- combinations of phases.
Its shape alone does not tell us everything inside it.
PART XXII — FLUID INCLUSIONS
Fluid inclusions are microscopic cavities containing trapped fluid.
They can preserve remarkable information about the conditions under which a mineral formed.
At gemmological magnification, they may appear as:
- liquid-filled cavities;
- two-phase inclusions;
- multi-phase inclusions;
- thin films;
- irregular channels.
Their interpretation can become highly specialised.
For routine gem identification, the important point is:
observe the number, shape, arrangement and apparent phases carefully before drawing conclusions.
PART XXIII — TWO-PHASE INCLUSIONS
A two-phase inclusion may contain, for example:
liquid + gas.
A gas bubble can sometimes be seen inside a liquid-filled cavity.
This can be diagnostically useful in some gem materials.
GIA notes that liquid or two-phase inclusions can provide useful evidence when examining emerald.
But again:
ONE FEATURE SHOULD RARELY CARRY THE ENTIRE IDENTIFICATION.
Combine inclusion evidence with physical and optical measurements.
PART XXIV — NEEDLES AND FIBRES
Needle-like inclusions occur in many gemstones.
They can be:
- isolated;
- parallel;
- intersecting;
- dense;
- sparse.
Their orientation may relate directly to the host crystal structure.
Dense oriented needles can even produce optical phenomena.
For example, oriented reflective inclusions in a cabochon can create:
chatoyancy
or:
asterism.
Thus a microscopic structure can become a macroscopic phenomenon.
PART XXV — FRACTURES
Fractures are among the most common features seen under magnification.
They may be:
- open;
- partially healed;
- fully healed;
- surface-reaching;
- internal;
- treatment-altered.
Their appearance can include:
- reflective flashes;
- feather-like patterns;
- irregular planes;
- networks.
The word:
fracture
is often safer initially than assigning a more specific genetic interpretation.
PART XXVI — HEALED FRACTURES
During geological growth or later geological events, fractures can partially heal.
The healing process can leave:
- networks of tiny cavities;
- fingerprints;
- veils;
- fluid remnants.
These structures can be beautiful.
They can also provide important evidence of:
natural geological history.
But similar-looking structures can occur in multiple gem species.
Pattern recognition must therefore be supported by broader identification data.
PART XXVII — “FINGERPRINTS”
The term:
fingerprint inclusion
usually describes a healed fracture containing a network of tiny cavities that visually resembles a fingerprint.
It does not mean that a human fingerprint somehow became trapped inside the gemstone.
Fingerprints are common inclusion structures in several natural gemstones.
They can be useful evidence.
But:
fingerprint = natural
should never be treated as an absolute rule without context.
PART XXVIII — COLOUR ZONING
Magnification can reveal colour zoning that is difficult to see with the unaided eye.
Look for:
- straight bands;
- angular zones;
- curved zones;
- sector boundaries;
- patchy colour.
Growth-related colour distribution can provide important clues.
In some materials, the geometry of colour zoning can contribute to separating:
natural growth
from:
synthetic growth.
But interpretation requires knowledge of the specific gemstone.
PART XXIX — GROWTH STRUCTURES
Crystals grow according to their internal crystallography and environment.
This can leave microscopic structures such as:
- growth bands;
- growth planes;
- zoning;
- growth tubes;
- sector boundaries.
Some are straight.
Some are angular.
Some can be curved.
Growth structures are particularly important when investigating:
natural versus synthetic gemstones.
But no single generic statement such as:
“curved = synthetic”
should be applied blindly to every material.
PART XXX — WHY IDENTIFICATION BY ONE INCLUSION IS DANGEROUS
Students often learn memorable inclusions:
lily pads = peridot
three-phase inclusions = emerald
curved striae = synthetic corundum
These associations can be useful.
But they can become dangerous shortcuts.
A feature may:
- resemble another feature;
- occur in more than one material;
- be altered by treatment;
- be misinterpreted because of lighting;
- be seen only partially.
Professional gemmology asks:
WHAT DOES THE TOTAL EVIDENCE SAY?
PART XXXI — THE MICROSCOPE
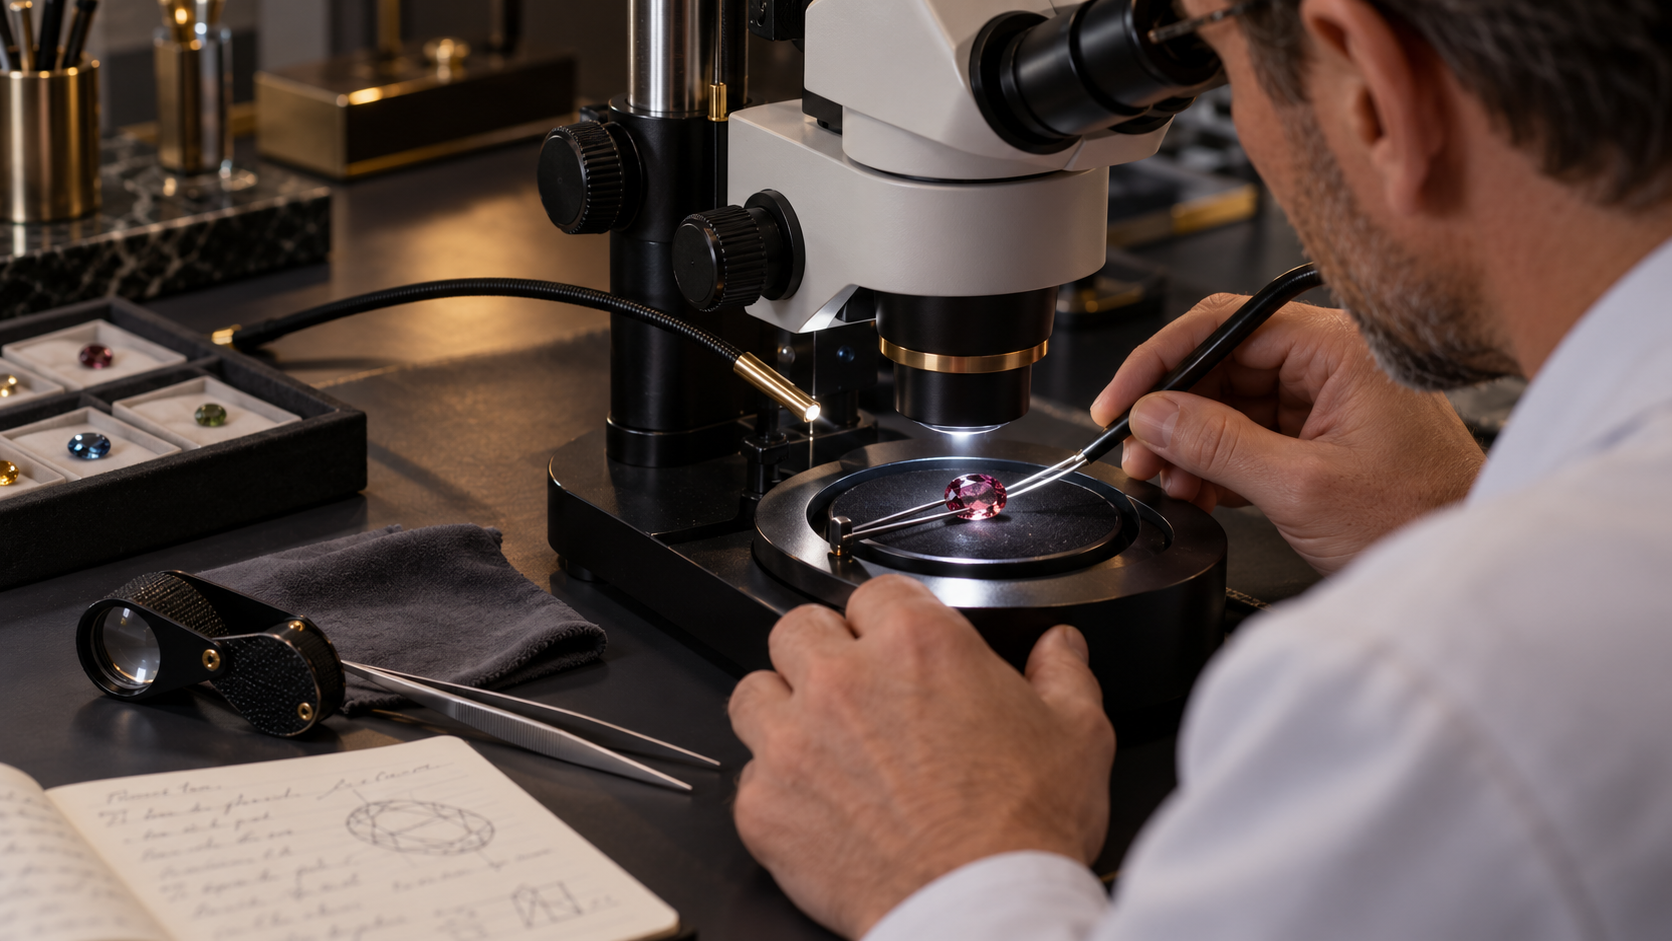
The gemmological microscope expands the possibilities of the loupe.
A typical binocular gem microscope offers:
- variable magnification;
- stereoscopic observation;
- adjustable focus;
- transmitted illumination;
- darkfield illumination;
- overhead or reflected illumination.
Additional lighting can include:
- fibre-optic illumination;
- diffused lighting;
- oblique lighting;
- polarised lighting.
The microscope is therefore not merely:
a stronger loupe.
It is a controlled lighting laboratory.
PART XXXII — BEGIN AT LOW MAGNIFICATION
A common beginner mistake is to immediately use maximum magnification.
Instead:
START LOW.
At low magnification you retain:
- wider field of view;
- better orientation;
- greater context.
Locate the feature first.
Then increase magnification.
Otherwise you may spend minutes searching through a tiny field without knowing which part of the gemstone you are viewing.
PART XXXIII — MAGNIFICATION DOES NOT EQUAL INFORMATION
Higher magnification can reveal smaller features.
But it also reduces:
- field of view;
- depth of field;
- brightness.
It can make navigation more difficult.
The best magnification is therefore:
THE LOWEST MAGNIFICATION THAT CLEARLY REVEALS THE FEATURE YOU NEED TO STUDY.
Move higher only when additional detail is genuinely useful.
PART XXXIV — DARKFIELD ILLUMINATION
Darkfield is one of the most important illumination techniques in gem microscopy.
The basic principle is elegant.
Direct illumination is prevented from travelling straight into the objective.
Instead, light enters the transparent specimen obliquely.
Features inside the specimen:
- scatter;
- reflect;
- refract
some of that light into the objective.
The result is:
bright internal features against a dark background.
This greatly increases contrast.
PART XXXV — WHY DARKFIELD WORKS SO WELL
Imagine a transparent gemstone containing a tiny crystal.
Without controlled illumination, both gemstone and inclusion may appear bright.
Contrast is poor.
In darkfield, the background becomes dark.
Light scattered from the inclusion enters the microscope.
The crystal suddenly appears:
bright and obvious.
This is why darkfield is so effective for locating inclusions.
GIA’s portable-instrument research describes the darkfield loupe as an exceptionally useful field instrument for precisely this reason.
PART XXXVI — DARKFIELD IS NOT A NEUTRAL VIEW
An important scientific warning:
DARKFIELD CHANGES APPEARANCE.
Nikon’s microscopy reference explains that darkfield images are formed primarily from light scattered, reflected or refracted by the specimen.
The resulting image has very high contrast but is not necessarily a perfect geometrical representation of the feature.
Therefore:
appearance under darkfield should be interpreted as an illumination-dependent observation.
This is extremely important in gemmology.
PART XXXVII — ONE INCLUSION, TWO APPEARANCES
GIA documented a striking crystal inclusion in red spinel.
Under:
darkfield illumination
the crystal appeared bright and almost suspended.
Under:
fibre-optic illumination
the same crystal became dark and displayed rainbow-like thin-film interference colours.
Same gemstone.
Same inclusion.
Different lighting.
Different appearance.
This demonstrates one of the central rules of microscopy:
NEVER TRUST ONLY ONE LIGHTING METHOD.
PART XXXVIII — BRIGHTFIELD
Brightfield transmits light through the gemstone more directly.
It can be useful for:
- colour zoning;
- growth structures;
- transparent inclusions;
- fluid inclusions;
- general transmitted-light examination.
Some features that appear spectacular under darkfield can become less obvious.
Other features may become clearer.
Switching illumination is part of the examination—not an optional artistic effect.
PART XXXIX — REFLECTED LIGHT
Reflected or overhead illumination is particularly useful for examining:
- surface polish;
- scratches;
- chips;
- facet junctions;
- cavities;
- surface-reaching fractures;
- lustre differences.
It can also help reveal certain inclusions when internal reflection directs the light favourably.
When the question is:
“Is this feature on the surface?”
reflected light is often extremely helpful.
PART XL — OBLIQUE LIGHTING
Oblique illumination sends light into the gemstone from the side.
This can reveal features that disappear under symmetrical illumination.
Fine:
- fractures;
- needles;
- growth structures;
- thin films
may become dramatically visible.
GIA has documented ultra-thin fluid inclusions in aquamarine that were barely noticeable under brightfield but became striking under:
oblique fibre-optic illumination.
Lighting direction can therefore determine whether a diagnostic feature is:
obvious
or:
almost invisible.
PART XLI — FIBRE-OPTIC ILLUMINATION
A fibre-optic light source provides a narrow, controllable beam.
The gemologist can direct it:
- from the side;
- from above;
- through a particular facet;
- nearly parallel to an inclusion plane.
This makes fibre-optic lighting especially valuable for:
- fractures;
- thin films;
- reflective crystals;
- growth structures;
- chatoyancy;
- asterism.
GIA regularly uses fibre-optic illumination in published inclusion studies because it can reveal optical information unavailable under ordinary lighting.
PART XLII — PINPOINT LIGHTING
A small concentrated light source can reveal highly reflective features.
Move the light rather than only moving the stone.
Observe when the feature:
- flashes;
- disappears;
- changes colour;
- becomes transparent;
- becomes reflective.
This dynamic behaviour contains information.
A static photograph cannot always communicate it.
PART XLIII — DIFFUSED LIGHT
Direct pinpoint illumination can sometimes produce excessive reflections.
Diffusing the light creates softer, more even illumination.
This can be useful for:
- broad growth structures;
- subtle colour zoning;
- surface texture;
- photographing inclusion scenes.
GIA photomicrography frequently combines diffused and directional illumination to balance multiple features.
PART XLIV — IMMERSION
Some gemstone features are difficult to see because facet reflections dominate the view.
Immersion can reduce surface reflections by placing the gemstone in a liquid whose refractive index is closer to that of the stone than air is.
This can make internal structures such as:
- colour zoning;
- growth patterns;
- internal boundaries
easier to observe.
GIA includes an immersion cell among recommended additional gem-identification equipment.
But immersion requires:
appropriate liquid selection and material safety.
Do not immerse an unknown or potentially sensitive gemstone casually.
PART XLV — WHY IMMERSION WORKS
At an:
air–gemstone boundary
the refractive-index difference is large.
This creates strong refraction and reflection.
Replace air with a liquid of higher refractive index and the optical contrast at the boundary decreases.
The facets become less visually dominant.
The observer can see more effectively:
through the shape of the cut
and into:
the structure of the material.
PART XLVI — MAGNIFICATION AND DOUBLY REFRACTIVE GEMS
Some anisotropic gemstones can cause features viewed through certain directions to appear:
doubled.
This can affect:
- facet edges;
- inclusions;
- internal features.
The classic example is zircon, where strong birefringence can produce obvious doubling through suitable viewing directions.
Do not mistake optical doubling for:
two separate inclusions.
Again:
rotate the stone.
Observe how the image behaves.
PART XLVII — NATURAL VERSUS SYNTHETIC
Microscopy is one of the most powerful tools for investigating:
natural versus synthetic origin.
Why?
Because natural crystals and laboratory-grown crystals form in different environments.
Those environments can leave different:
- inclusions;
- growth structures;
- zoning patterns;
- residues;
- internal textures.
But modern synthetics can be sophisticated.
Some contain inclusions deliberately or naturally produced during growth that resemble natural features.
Therefore:
MICROSCOPY CAN PROVIDE POWERFUL EVIDENCE WITHOUT ALWAYS PROVIDING FINAL PROOF.
PART XLVIII — HEAT TREATMENT
Heat can modify existing inclusions.
Possible microscopic consequences can include:
- altered crystals;
- stress fractures;
- melted or partially melted inclusions;
- healed fissures;
- decrepitation features;
- modified rutile.
GIA recently documented colourful thin-film decrepitation inclusions in beryllium-diffused orange sapphire associated with high-temperature treatment.
But the authors also make an important distinction:
the particular inclusion scene was:
not by itself diagnostic of diffusion.
That sentence expresses excellent gemmological practice.
An observation can be consistent with treatment without independently proving the exact treatment.
PART XLIX — FRACTURE FILLING
Some gemstones contain fractures filled with foreign substances to improve apparent clarity.
Under magnification, possible evidence can include:
- flash effects;
- flow structures;
- bubbles;
- differences in lustre;
- filled surface-reaching fissures.
The exact appearance depends on:
- gemstone;
- filling material;
- treatment process;
- lighting.
Darkfield and oblique illumination can be particularly useful.
Gem-A specifically notes that a darkfield loupe can assist observation of fracture-filled diamonds and rubies.
PART L — OILING
Emerald fractures are commonly filled with oil or other substances to reduce their visibility.
Microscopic examination may reveal evidence such as:
- surface-reaching fissures;
- differences in relief;
- interference effects;
- partially filled fractures.
But determining the precise nature and extent of filling can require laboratory methods.
The microscope can raise the question.
It does not always provide the complete answer.
PART LI — GAS BUBBLES
Gas bubbles are famous in gem identification.
But the rule:
“bubble = glass”
is too simplistic.
Gas phases can occur naturally inside fluid inclusions.
What matters is:
- shape;
- context;
- host feature;
- arrangement;
- associated structures.
A perfectly round isolated bubble in a homogeneous glassy material means something very different from a gas bubble moving inside a naturally shaped fluid cavity.
Context is everything.
PART LII — THE DANGER OF PATTERN RECOGNITION
Human brains are excellent at finding familiar shapes.
This is useful.
It is also dangerous.
Under a microscope we may think:
That looks like a feather.
That looks like a fingerprint.
That looks like a bubble.
That looks like curved growth.
But resemblance is not identification.
Describe first:
irregular reflective planar feature
before deciding:
fracture.
Describe:
rounded transparent feature
before deciding:
gas bubble.
Good descriptive discipline reduces confirmation bias.
PART LIII — OBSERVATION VERSUS INTERPRETATION
Separate your notes into two categories.
OBSERVATION
“Numerous fine parallel needles.”
INTERPRETATION
“Possible oriented rutile.”
Observation records what is actually visible.
Interpretation explains what you think it means.
This distinction is fundamental to scientific examination.
If later evidence changes your interpretation, the original observation remains valid.
PART LIV — RECORD LOCATION
Do not merely write:
“crystal inclusion.”
Write:
“Small transparent euhedral crystal beneath the upper-right crown area, visible through table and adjacent crown facet.”
Location matters because it lets you:
- find the feature again;
- photograph it;
- compare observations;
- determine depth;
- distinguish it from reflections.
A simple sketch of the gemstone can be extremely useful.
PART LV — RECORD MAGNIFICATION
A feature photographed at:
10×
is not directly comparable visually to one photographed at:
80×
unless scale is known.
Record:
- microscope magnification;
- approximate field of view where available;
- lighting method.
Professional inclusion photography often reports:
field of view
rather than simply microscope magnification because the final displayed image can be enlarged independently.
PART LVI — RECORD THE LIGHTING
This is essential.
Write:
Darkfield
Brightfield
Reflected light
Oblique fibre optic
Diffused light
as appropriate.
Why?
Because the same inclusion may look radically different under different illumination.
Without lighting information, an observation or photograph loses part of its scientific context.
PART LVII — DO NOT OVER-PHOTOGRAPH
A beautiful microscopic photograph is not automatically diagnostically useful.
Before photographing, ask:
What does this image document?
Perhaps:
- inclusion morphology;
- growth zoning;
- treatment feature;
- surface damage;
- phenomenon-causing needles.
The goal is not simply to create:
microscopic gemstone art.
It is to preserve evidence.
PART LVIII — THE PROFESSIONAL EXAMINATION ORDER
A useful NGB workflow is:
1. CLEAN
Remove dust and fingerprints safely.
↓
2. UNAIDED-EYE OBSERVATION
Colour, transparency, cut, obvious features.
↓
3. 10× SURFACE EXAMINATION
Scratches, chips, cavities, polish, facet junctions.
↓
4. 10× INTERNAL SCAN
Table → crown → pavilion.
↓
5. ROTATE
Observe every accessible direction.
↓
6. FOCUS THROUGH DEPTH
Separate surface, shallow and deep features.
↓
7. CLASSIFY FEATURES
Solid? Fluid? Fracture? Growth structure? Surface feature?
↓
8. MOVE TO THE MICROSCOPE
Begin at low magnification.
↓
9. DARKFIELD
Locate internal features.
↓
10. CHANGE ILLUMINATION
Brightfield → reflected → oblique → fibre optic as appropriate.
↓
11. INCREASE MAGNIFICATION ONLY WHEN NECESSARY
Study specific features.
↓
12. RECORD
Location, morphology, lighting, magnification.
↓
13. INTERPRET
Only after observation.
↓
14. CORRELATE WITH OTHER TESTS
RI, birefringence, optic character, spectrum, SG and advanced analysis where necessary.
↓
EVIDENCE-BASED GEM IDENTIFICATION.
PART LIX — A PRACTICAL UNKNOWN-STONE EXERCISE
Imagine an unknown transparent green gemstone.
At first glance:
green, transparent, faceted.
That tells us very little.
Under 10×:
You observe several internal features.
One appears to be a cavity containing:
liquid + a gas bubble.
Another is a small transparent crystal.
There are several irregular healed fissures.
Interesting.
But do not declare:
emerald.
Next measure RI.
Determine optic character.
Examine pleochroism.
Observe the spectrum.
Now the inclusion scene becomes part of:
a converging body of evidence.
This is how microscopy should function.
PART LX — ANOTHER UNKNOWN STONE
Now examine a yellow-green stone.
At 10× you observe:
disc-like fractures surrounding small inclusions.
These resemble the well-known:
lily-pad inclusions
associated with peridot.
GIA specifically cites lily-pad inclusions as useful evidence for separating peridot from demantoid garnet.
This is strong supporting evidence.
But still:
measure RI.
Peridot and garnet have fundamentally different optical properties.
The loupe creates the hypothesis.
The instruments test it.
PART LXI — WHEN 10× IS ENOUGH
Not every gemstone requires prolonged microscopy.
A loupe may reveal enough to:
- identify obvious damage;
- detect major fractures;
- recognise a characteristic inclusion scene;
- decide whether treatment investigation is needed;
- determine whether further laboratory work is justified.
The best gemologist is not the person who uses the most equipment.
It is the person who knows:
which evidence is required.
PART LXII — WHEN THE MICROSCOPE IS ESSENTIAL
Move beyond the loupe when:
- features are too small;
- treatment is suspected;
- natural versus synthetic origin is important;
- growth structures require analysis;
- fluid inclusions require closer examination;
- fracture filling is suspected;
- subtle zoning must be evaluated;
- a potentially diagnostic inclusion requires confirmation.
The microscope increases both:
resolution
and:
lighting control.
Often the second advantage is more important than the first.
PART LXIII — WHEN THE MICROSCOPE IS NOT ENOUGH
There are cases where microscopy cannot answer the question conclusively.
Then laboratory techniques may be required, including:
- Raman spectroscopy;
- FTIR spectroscopy;
- UV-Vis-NIR spectroscopy;
- photoluminescence;
- X-ray fluorescence;
- LA-ICP-MS;
- advanced imaging.
GIA’s recent pezzottaite investigation, for example, combined traditional gemmological observation with Raman and FTIR spectroscopy to verify material properties.
The microscope is powerful.
It is not omnipotent.
PART LXIV — COMMON MISTAKE 1
STARTING AT MAXIMUM MAGNIFICATION
Why it fails:
You lose context and struggle to navigate.
Better:
Start low → locate → centre → magnify.
PART LXV — COMMON MISTAKE 2
USING ONLY DARKFIELD
Why it fails:
Some features change dramatically or disappear under different illumination.
Better:
Darkfield → brightfield → reflected → oblique / fibre optic where useful.
PART LXVI — COMMON MISTAKE 3
IDENTIFYING THE GEM FROM ONE INCLUSION
Why it fails:
Many inclusion types occur in multiple materials.
Better:
Inclusions + RI + optic character + other evidence.
PART LXVII — COMMON MISTAKE 4
CONFUSING DUST WITH INCLUSIONS
Why it fails:
At high magnification, tiny surface contamination can appear extremely prominent.
Better:
Clean → focus through depth → re-examine.
PART LXVIII — COMMON MISTAKE 5
CONFUSING REFLECTIONS WITH MULTIPLE INCLUSIONS
Why it fails:
Facets can create several images of one feature.
Better:
Rotate the stone and trace the feature through different viewing directions.
PART LXIX — COMMON MISTAKE 6
CALLING EVERY LINE A FRACTURE
A line may be:
- a scratch;
- growth zoning;
- a needle;
- a fracture;
- a facet reflection;
- a polishing line.
Better:
change focus, orientation and illumination.
PART LXX — COMMON MISTAKE 7
CALLING EVERY ROUND FEATURE A GAS BUBBLE
Round features can have multiple origins.
Better:
Study:
- context;
- relief;
- movement;
- host cavity;
- associated phases.
PART LXXI — COMMON MISTAKE 8
SEARCHING ONLY FOR WHAT YOU EXPECT
If someone tells you:
“This is natural ruby,”
you may unconsciously search for natural-ruby inclusions.
That is confirmation bias.
A stronger approach is:
describe first, interpret second.
Let the evidence constrain the conclusion.
PART LXXII — THE MOST IMPORTANT HABIT
Before naming an inclusion, say to yourself:
WHAT DO I ACTUALLY SEE?
Not:
What do I think this stone is?
But:
What is physically observable?
For example:
Poor observation:
“Synthetic growth lines.”
Better observation:
“Fine curved parallel bands visible under transmitted light.”
Interpretation can follow.
This single habit dramatically improves gemmological reasoning.
PART LXXIII — BUILD AN INCLUSION LIBRARY
Microscopy skill develops through:
comparison.
Study known examples of:
- ruby;
- sapphire;
- emerald;
- spinel;
- quartz;
- tourmaline;
- zircon;
- peridot;
- garnet;
- topaz;
- beryl;
- synthetic materials.
Record:
- inclusion morphology;
- lighting;
- magnification;
- material identity.
Over time, patterns become familiar.
But always preserve the distinction between:
recognition
and:
proof.
PART LXXIV — WHY GIA’S MICRO-WORLD IS SO USEFUL
GIA’s Gems & Gemology regularly publishes microscopic observations under its:
Micro-World
section.
These reports are valuable because they do not merely show attractive inclusions.
They document:
- material;
- feature;
- illumination;
- field of view;
- interpretation.
This is the correct scientific mindset for inclusion study.
The image is evidence accompanied by context.
PART LXXV — MAGNIFICATION AND NGB GEMSTONE EVALUATION
Magnification contributes directly to several NGB grading and verification fields.
For a faceted gemstone it can inform:
CLARITY
Nature, visibility and position of inclusions.
NATURAL CHARACTERISTICS
Observed crystals, fractures, needles, zoning or growth features.
TRANSPARENCY NOTES
How internal features affect light transmission.
CUT
Surface polish, abrasion, facet junctions and damage.
OPTICAL PERFORMANCE
Whether inclusions, fractures or extinction materially influence light return.
EVALUATION NOTES
Interpretation of the gemstone as a complete object.
But:
MAGNIFICATION SHOULD DESCRIBE THE STONE, NOT PUNISH IT FOR BEING NATURAL.
PART LXXVI — INCLUSIONS ARE NOT AUTOMATICALLY DEFECTS
In commercial grading, inclusions can affect clarity and value.
But scientifically they are much more than imperfections.
An inclusion may preserve evidence of:
- geological formation;
- crystal growth;
- fluid history;
- pressure;
- temperature;
- later deformation.
Some inclusions also create valued phenomena.
Without oriented inclusions there would be no:
cat’s-eye effect
in many chatoyant gems.
Without appropriate oriented inclusions there would be no:
asterism
in star gemstones.
The same microscopic world that can reduce transparency can also create:
rarity, identity and beauty.
PART LXXVII — THE GEMSTONE AS A GEOLOGICAL ARCHIVE
A transparent gemstone may look visually simple.
Under the microscope it can contain evidence from millions of years of geological history.
A trapped crystal may have existed:
before the host finished growing.
A healed fracture may record:
a later geological event.
A fluid inclusion may preserve:
part of the environment in which crystallisation occurred.
A treatment feature may record:
human intervention after mining.
Magnification therefore lets us read:
A TIMELINE INSIDE THE GEMSTONE.
PART LXXVIII — THE LIMIT OF VISUAL CERTAINTY
There is an important professional phrase:
“No diagnostic inclusions observed.”
That does not mean:
“Nothing is there.”
It means that under the conditions of examination, no microscopic feature was observed that independently resolved the question.
A clean gemstone may require:
more instrumental analysis, not more confidence.
Absence of evidence is not automatically evidence of absence.
PART LXXIX — THE NGB MAGNIFICATION CHECKLIST
Before finishing an examination, ask:
Was the stone cleaned?
Was it inspected unaided?
Were all accessible surfaces examined?
Was the interior scanned systematically?
Was the stone rotated?
Were different depths examined?
Were possible reflections considered?
Was more than one lighting technique used?
Were observations separated from interpretations?
Were important features recorded?
Were inclusion observations correlated with other gemmological tests?
If yes, magnification has been used as:
a gemmological method
rather than merely:
a magnifying device.
Conclusion
A 10× loupe is one of the simplest instruments on a gemologist’s desk.
Yet learning to use it properly teaches one of the deepest principles in gemmology:
OBSERVATION MUST COME BEFORE CONCLUSION.
The process begins before magnification.
Clean the gemstone appropriately.
Observe:
- colour;
- transparency;
- cut;
- lustre;
- visible damage.
Then use the loupe.
Start with the surface.
Move into the interior.
Focus through different depths.
Rotate the gemstone.
Look through:
- table;
- crown;
- pavilion.
When more information is required, move to the microscope.
Begin at low magnification.
Then change not only:
magnification
but also:
illumination.
Darkfield can make faint inclusions brilliant against a dark background.
Brightfield can reveal transparent growth structures.
Reflected light can expose surface features.
Oblique and fibre-optic illumination can reveal fractures, thin films, needles and structures that may remain nearly invisible under ordinary lighting.
And this leads to perhaps the most important lesson in gemstone microscopy:
THE APPEARANCE OF AN INCLUSION DEPENDS ON HOW YOU OBSERVE IT.
GIA’s documented red-spinel crystal provides an excellent example.
Under darkfield, the inclusion appeared bright and suspended.
Under fibre-optic illumination, the same crystal became dark and revealed interference colours.
Nothing inside the gemstone changed.
Only the illumination did.
Therefore a professional examination should never depend on:
one view
one angle
one magnification
or:
one lighting method.
Nor should one attractive inclusion automatically determine gemstone identity.
Microscopy produces:
evidence.
That evidence must be integrated with:
- refractive index;
- birefringence;
- optic character;
- spectroscopy;
- specific gravity;
- other appropriate tests.
Sometimes microscopy can provide remarkably strong identification evidence.
Sometimes it reveals treatment.
Sometimes it helps distinguish natural from synthetic material.
And sometimes it tells the gemologist:
more advanced testing is required.
That is not a failure.
It is correct scientific practice.
A gemstone under magnification is not merely a larger version of the gemstone seen with the naked eye.
It becomes a landscape of:
growth
fracture
crystallisation
fluids
inclusions
treatment
and:
geological history.
The objective is not simply to find imperfections.
It is to learn how to read that landscape.
The professional workflow is therefore:
CLEAN
↓
OBSERVE
↓
MAGNIFY
↓
ROTATE
↓
CHANGE THE LIGHT
↓
DESCRIBE
↓
INTERPRET
↓
VERIFY.
That is how a loupe becomes a gemmological instrument.
References & Further Reading
Gemological Institute of America (GIA) — Gem Identification: Equipment Introduction.
GIA’s practical gem-identification curriculum lists a fully corrected 10× loupe among the basic instruments required for gem identification and additionally recommends a gemmological microscope, darkfield loupe and immersion cell. This provides an authoritative framework for the progression used in this guide from loupe observation toward controlled microscopic examination.
https://elearning-samples.gia.edu/Gem_Identification/Page12.html
Boehm, E. W. — “Portable Instruments and Tips on Practical Gemology in the Field.” Gems & Gemology / Gemological Institute of America.
An excellent practical reference on portable gemmological examination. Particularly valuable for darkfield loupe technique and field microscopy. The article discusses the importance of 10× observation and demonstrates how darkfield illumination can reveal internal inclusion scenes even outside a full laboratory environment.
https://www.gia.edu/doc/Portable-Instruments-and-Tips-on-Practical-Gemology-in-the-Field.pdf
Gemological Institute of America (GIA) — “A Case of Mistaken Identity?”
Useful practical demonstration of why magnification forms part of an evidence-based identification workflow. GIA discusses how inclusions visible with a 10× loupe can help separate visually similar gemstones, including liquid or two-phase inclusions in emerald and characteristic lily-pad structures in peridot.
https://www.gia.edu/gia-news-research/case-mistaken-identity
Corvin, I. — “Suspended Crystal in Red Spinel.” Gems & Gemology, Winter 2023, Vol. 59, No. 4. Gemological Institute of America.
An especially valuable reference for understanding illumination. The same crystal inclusion in red spinel appeared bright and suspended under darkfield illumination but darkened and displayed thin-film interference colours under fibre-optic lighting. This demonstrates why professional microscopic examination should use multiple lighting techniques.
https://www.gia.edu/gems-gemology/winter-2023-microworld-suspended-crystal-in-red-spinel
Thudsanapbunya, M. — “Thin-Film Fluid Inclusions in Aquamarine.” Gems & Gemology, Spring 2021, Vol. 57, No. 1. Gemological Institute of America.
Excellent example of the diagnostic importance of lighting direction. Ultra-thin fluid inclusions in aquamarine that were barely visible under brightfield illumination became conspicuous under oblique fibre-optic lighting and displayed interference colours.
https://www.gia.edu/gems-gemology/spring-2021-microworld-thin-film-fluid-inclusions-in-aquamarine
Henry, R. E., Linzmeyer, T. & Hernandez, J. — “Iridescent Tubes in Pezzottaite.” Gems & Gemology, Fall 2024, Vol. 60, No. 3. Gemological Institute of America.
Modern laboratory example combining classical microscopic observation with advanced testing. The report documents growth banding and tube inclusions under different illumination and confirms aspects of the material using Raman and FTIR spectroscopy—an excellent demonstration of the boundary between microscopy and advanced gem analysis.
https://www.gia.edu/gems-gemology/fall-2024-lab-notes-iridescent-tubes-in-pezzottaite
Hughes, E. B. — “Colorful Mosaic Pattern in Heated Orange Sapphire.” Gems & Gemology, Summer 2026, Vol. 62, No. 2. Gemological Institute of America.
Recent example of treatment-related microscopic observation. Thin-film decrepitation inclusions in beryllium-diffused orange sapphire produced a colourful mosaic under diffused fibre-optic illumination. Importantly, the report notes that the inclusion scene itself is not independently diagnostic of diffusion, illustrating the need for cautious interpretation.
https://www.gia.edu/gems-gemology/summer-2026-microworld-colorful-mosaic-pattern-in-sapphire
Schmetzer, K. & Steinbach, M. P. — “Three-Rayed Asterism in Quartz.” Gems & Gemology, Summer 2022, Vol. 58, No. 2. Gemological Institute of America.
Useful reference connecting microscopic inclusions with macroscopic optical phenomena. The authors explain how parallel needles or channels can produce chatoyancy and how multiple oriented inclusion sets can create asterism.
https://www.gia.edu/gems-gemology/summer-2022-gemnews-three-rayed-asterism-quartz
Nikon MicroscopyU — “Darkfield Illumination.”
Detailed optical explanation of darkfield microscopy. Nikon explains how oblique illumination prevents direct light from entering the objective while light scattered, reflected or refracted by specimen features becomes visible against a dark background. The reference also cautions that darkfield images are highly contrast-enhanced and should not automatically be interpreted as exact geometrical representations.
https://www.microscopyu.com/techniques/stereomicroscopy/darkfield-illumination
Gem-A — “10× Triplet Loupe.” Gem-A Instruments.
Technical reference for the standard gemmological triplet loupe. Gem-A specifies an achromatic and aplanatic optical system designed to provide a clear, corrected field for examining diamonds and coloured gemstones.
https://shop.gem-a.com/product/gem-a-10x-triplet-loupe-with-black-finish/
Gem-A — “10× Darkfield Loupe.” Gem-A Instruments.
Practical reference for portable darkfield examination. Gem-A specifically notes the instrument’s usefulness for observing inclusions in diamonds and coloured gemstones and for examining fracture-filled diamonds and rubies.
https://shop.gem-a.com/product/gem-a-10x-darkfield-loupe-with-torch/